
Skip ahead!
This article is a part of a series on how to set up a CI/CD TypeScript server from scratch. Some of the examples here might not make sense if you haven’t read the previous articles, so if you want to follow along with the whole thing, head to the first article!
Now that we’ve created our typescript project, added linting and added some unit testing, let’s hook up our project with a continuous integration (CI) pipeline.
When used with git storage providers such as GitHub, CI pipelines ensure that any code making its way in to the master branch of our project has passed a number of predefined checks. This helps to prevent faulty code from making its way in to the code base and ensures that the code that goes in meets the standards that we have set.
For this article, we will be setting up TravisCI to be used with our Github flow. TravisCI is a hosted CI service that is free for use with open-source projects.
Setting up GitHub
If you haven’t already, now is the time to push our project to GitHub. You can do this by heading to your github, and clicking on the new button in the top right corner.
From here, make sure that you do not create a README.md or .gitignore file.
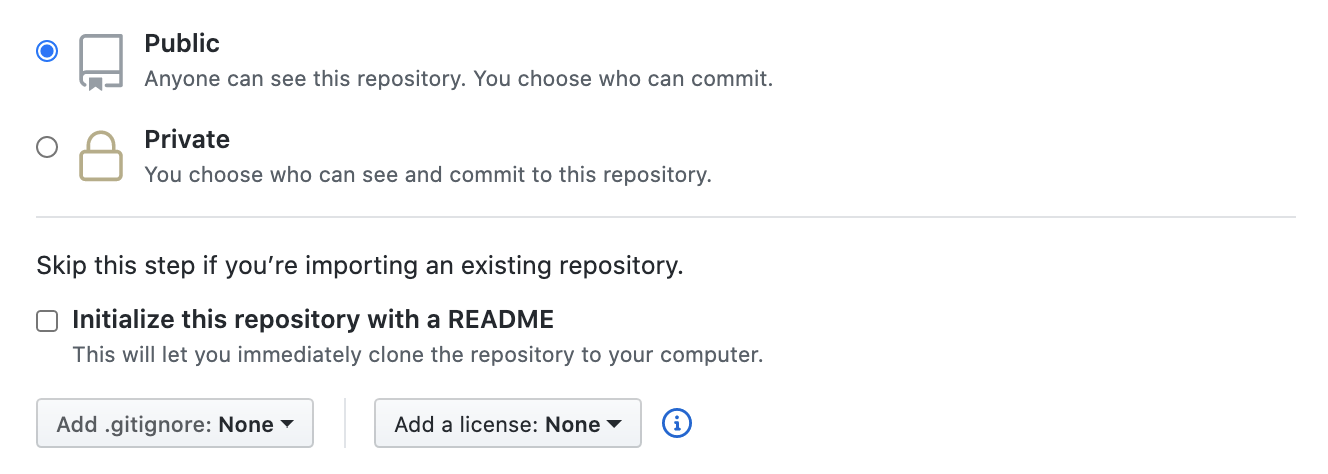
Because we already have our git repo initialised, all we need to do is link the remote repo to our local repo and push the changes. Follow the instructions on your empty repository page to do that.

Great! Now that our repo is on GitHub, we can start setting up TravisCI.
Connecting with TravisCI
Next, lets create a TravisCI account and link it with GitHub. From the official TravisCI docs:
- Head on over to travis-ci.com and sign in with your Github account.
- Accept the Authorization of Travis CI. You’ll be redirected to GitHub.
- Click on your profile picture in the top right of your Travis Dashboard, click Settings and then the green Activate button, and select the repositories you want to use with Travis CI.
After completing these steps, you should be able to see a list of your repositories in your TravisCI dashboard, with an option to trigger a build.
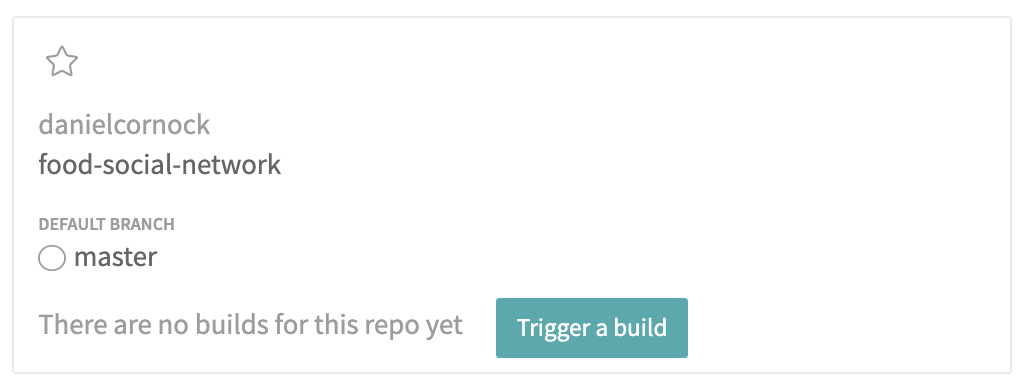
But wait! We can’t do that yet. First, we need to create a config file that Travis will use to know what checks to run.
Creating our config file
In the root directory of our project, create a new file called .travis.yml. In here we need to tell Travis a few things:
- The language that our project is using (NodeJS).
- The version of node that we are using.
- The scripts that we want Travis to execute from our
package.jsonfile.
While your node version may differ, you can copy the contents of the snippet below and place it in to your own .travis.yml file.
.travis.yml
language: node_js
node_js:
  - '12.14.1'
script:
  - npm run build
  - npm run lint
  - npm run test
You may have noticed that we have an unfamiliar script in there - npm run build. We haven’t implemented that in our package file yet, so let’s do that now. Add the following line to your scripts object in your package.json file.
package.json
"build": "tsc"
This will run the typescript compiler once, and will fail if TypeScript encounters any errors.
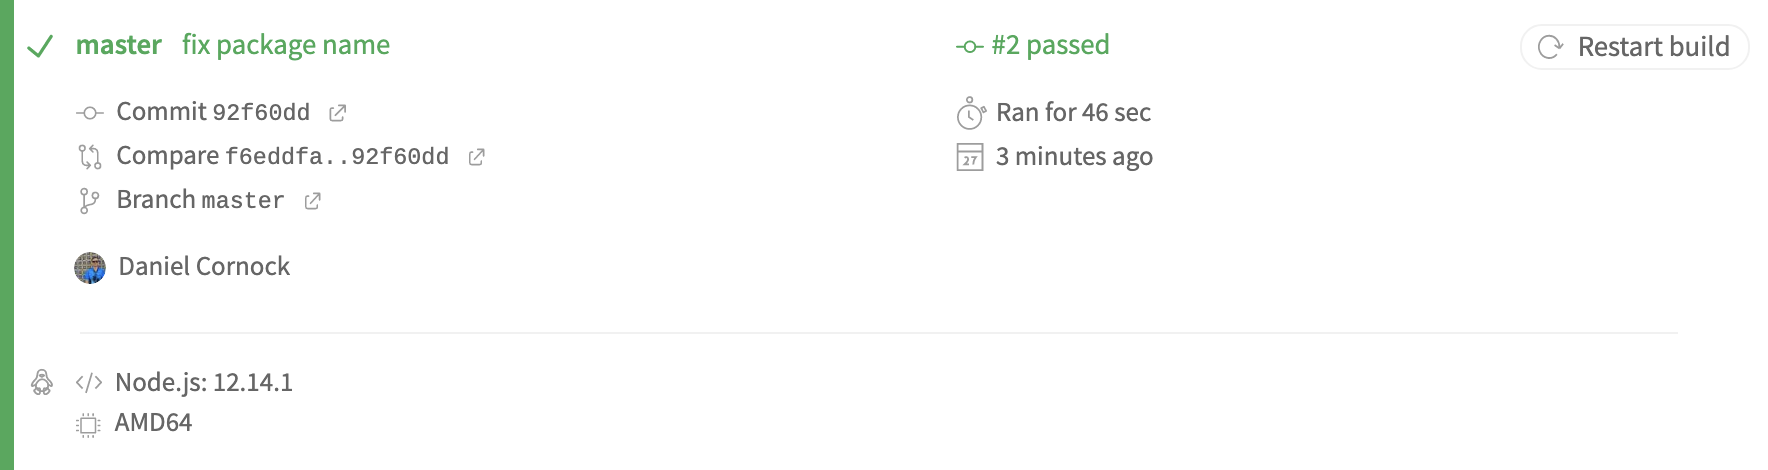
Great! So now we have configured our pipeline to lint, test, and build our code. Commit & push your latest changes and head back to the Travis dashboard. Your repository may have already started building, but if it hasn’t, go ahead and click on the Trigger a build button.
You can click on the build to watch it run through the procedure of checking our code. Because our package is so small, it should take less than a minute.
Given that everything goes smoothly, and you have no errors in your code, you’ll be greeted with this lovely confirmation:
Now that’s all well and good, but at the moment it’s just something nice to look at. Next, let’s work on restricting access to the repo unless these checks pass.
Protecting our master branch
This step is optional if it is a personal project. By doing this, it means that every commit you make to your repo must be done via a pull request. While this is good practise (this is the preferred method used professionally), you may find it slows you down.
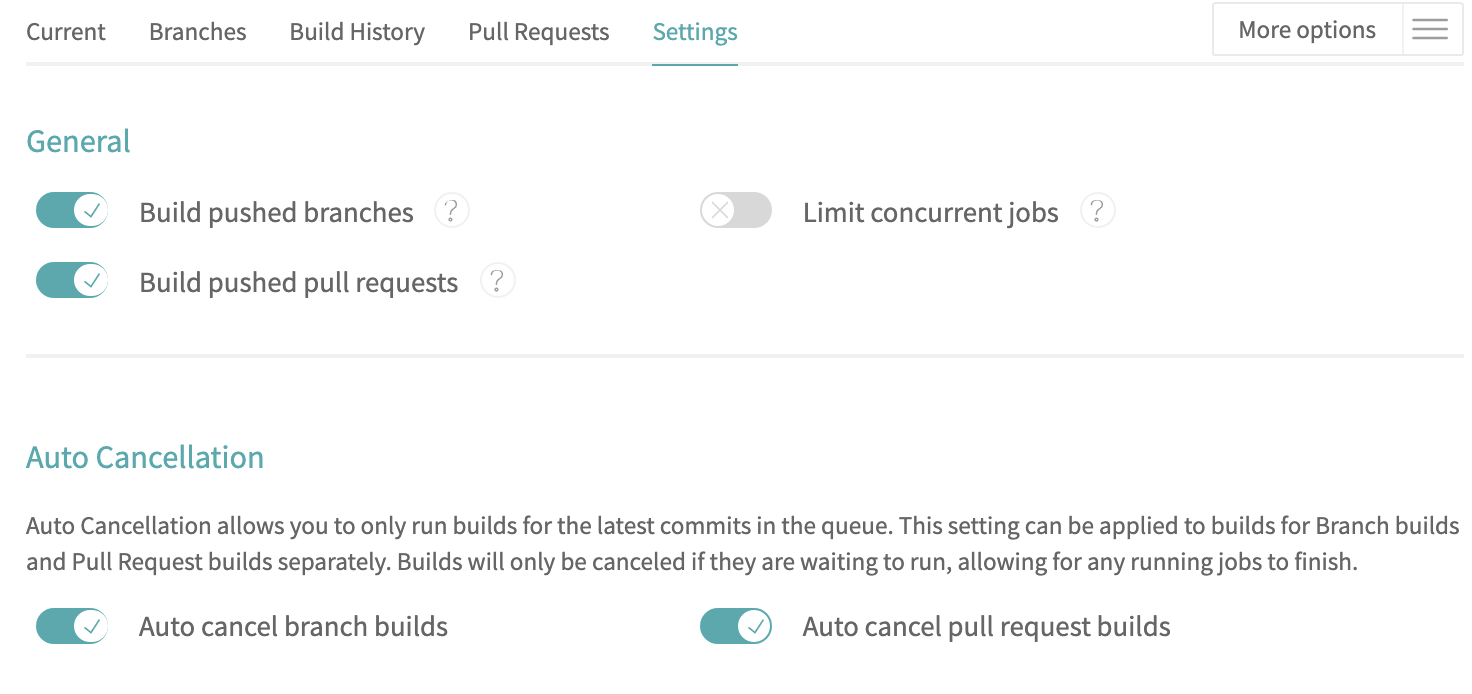
On the page for our current build, head to to the top right and click on More options then settings. Here we can configure when we want our builds to be ran.
Make sure that Build pushed branches is checked. The rest of the settings are up to you, depending on how often you want your builds to run.
You can view the config I am using here:
Next, head to your github repo for this project, head to settings and then Branches. Once here, go down to Branch protection rules and click Add rule.
In this section, you can configure it based on your needs. For my configuration, I will be doing the following:
- Set the
Branch name patternto be ‘master’. - Require status checks to pass before merging.
- Select the status check you want to use (mine is Travis CI - Branch).
- Include administrators.
NOTE: If you don’t have an option to select a branch for a status check, you may have to make a commit to your GitHub repo in order to make it available to select.
Hit save changes, and your changes will be in effect. You will now find that you cannot push directly to the master branch. To commit code to your codebase, you will now have to create a pull request and merge it.
If you get sick of having to create pull requests for everything, you can untick the option for including administrators at any time.
Conclusion
Congratulations! You have now protected your remote codebase from being polluted by broken tests, smelly code and broken builds!
I hope you enjoyed and learned from this series, and can now go on with confidence that your codebases will be cleaner than ever before.