
Skip ahead!
Web scraping is something that I have stayed away from for some time, mostly because I never had a need for it with the endless amounts of free APIs out there. However, sometimes you want the data from a service that doesn’t have a publicly exposed API. When you run in to that problem, web scraping is here to help!
For my use case, I want to build a dashboard where I can keep track of all my bank accounts, savings and investments. I currently use Trading212 for my investments, which doesn’t yet have a public API available. So, let’s get to work and solve this problem.
Setting up
First off, we’ll create a new project. In a folder of your choice, run the following for a nice speedy set up:
mkdir web-scraper
cd web-scraper
npm init -y
Open this folder in a code editor of your choice, and then install puppeteer.
npm i puppeteer
Puppeteer is an open source node library that provides a high level API to allow the traversal and scraping of websites. For further reading, visit the GitHub repo.
That’s the only dependency we will need for this project, so now we’re ready to write some code!
Starting up puppeteer
Now that our project is set up, we can get puppeteer up and running and navigate to our chosen page. First off, create a new file, name it index.js and pop the following code in there.
const puppeteer = require('puppeteer');

(async function example() {
  console.log('> Launching Puppeteer');
  let browser = await puppeteer.launch({ headless: false });

  console.log('> Opening new window in Chrome');
  let page = await browser.newPage();

  console.log('> Navigating to Trading212');
  await page.goto('https://live.trading212.com');
})();
In the above snippet, we have:
- Required puppeteer in the current file.
- Wrapped our code in an IIFE (immediately invoked function expression);
- Launched puppeteer.
- Opened a new window in chrome.
- Navigated to our chosen site.
This snippet will be fairly common among any web scraping project, so feel free to copy and paste the code in there straight in to your own project. To view this, run node index.js in the command line and watch as a chromium window opens and up pops our website of choice. So far so good!
Logging in
Now, we have a hurdle. In order to access my data, I need to log in. No worries, we just need to do a bit of digging around the HTML.
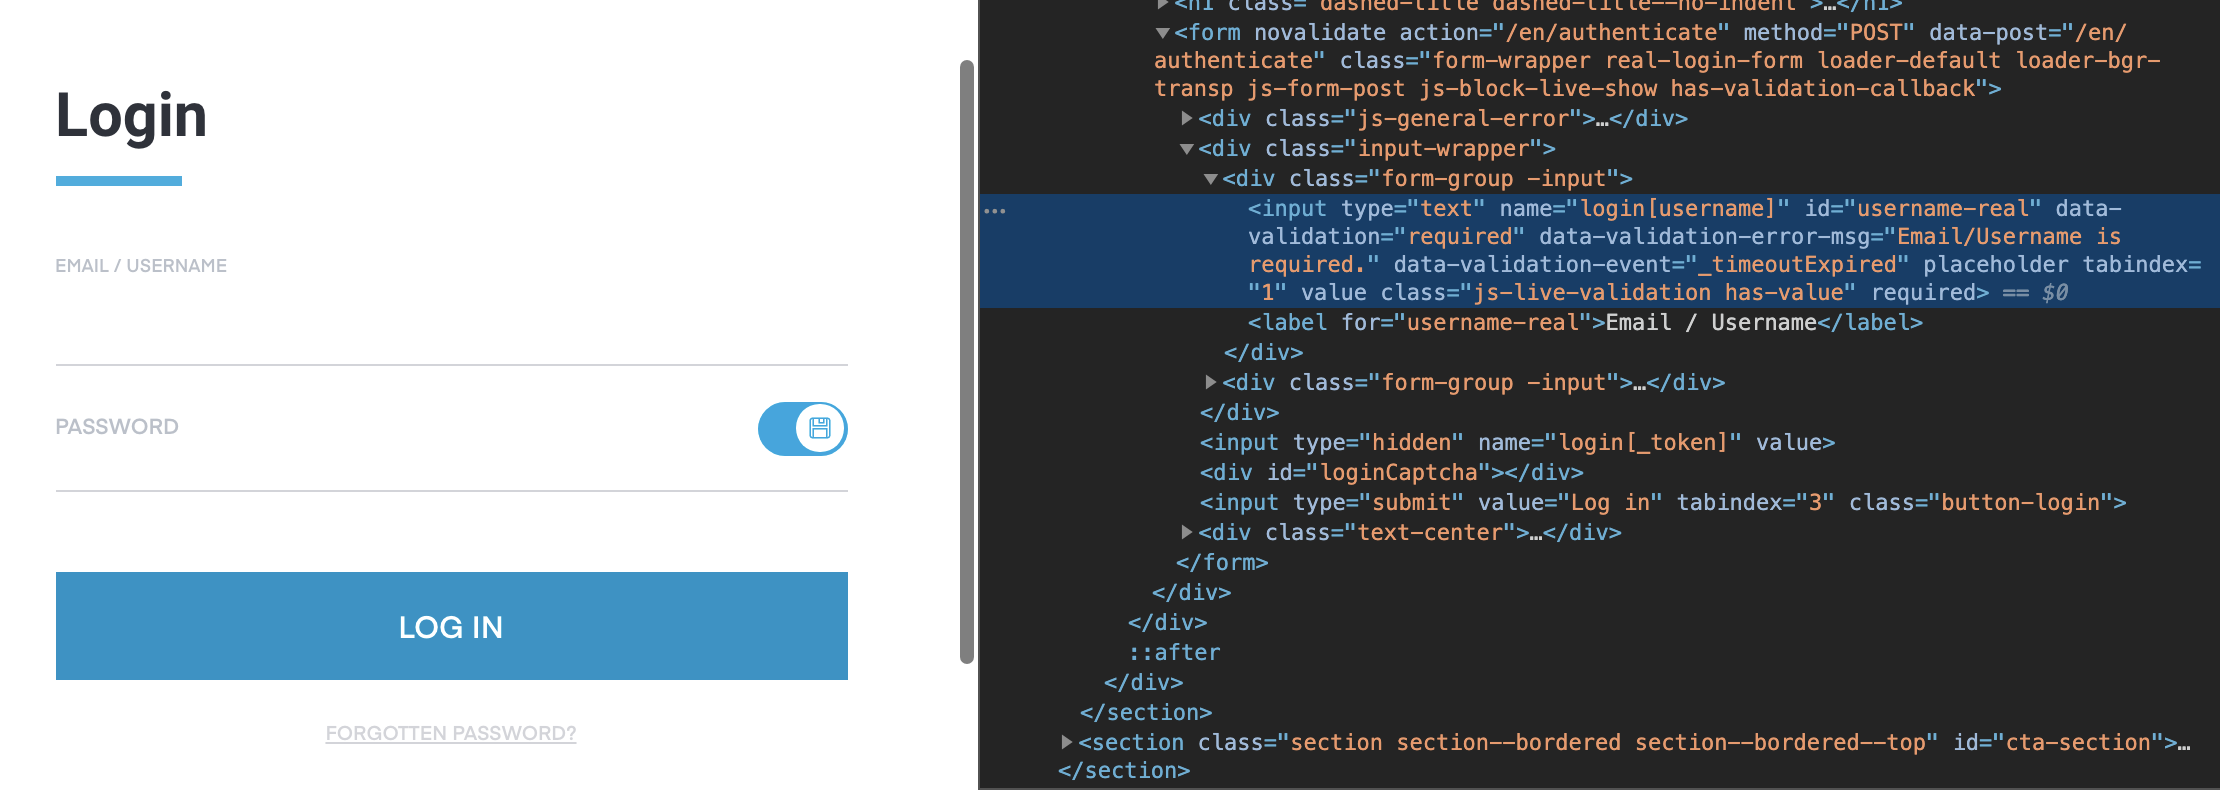
In order to fill in my credentials, we need to find something in the attributes of this input that we can use to select the element. For this input, I’ve chosen to select it using the id: #username-real.
To programmatically fill in our credentials, let’s add the following to the bottom of our existing function - we can also fill in the password in the same way.
console.log('> Entering email address');
await page.type('#username-real', 'johnsmith@email.com', {
  delay: 30
});

console.log('> Entering password');
await page.type('#pass-real', 'SuperSecurePassword1', {
  delay: 30
});
In the above snippet, we are using the page variable returned from when we opened the new Chrome window. On this variable we use the type method, entering the CSS selector, the value that we want to enter and an object containing the delay that we want to add as the arguments for the function.
Finally, we can simulate the user pressing the Enter button in order to submit our log in request. As the password field is focused, we can use:
await page.keyboard.press('Enter');
Now, go ahead and run node index.js again and watch as the robot enters your username and password and logs in to your chosen website. Spooky! 👻
Waiting for our page to load
Now, we need a way to know when our data has loaded and is ready to be scraped. There are a few ways to do this, but one that works universally is the waitForSelector method that is attached to our page variable.
console.log('> Waiting for load...');
await page.waitForSelector('tbody.table-body');
With this method, we pass a CSS selector (that we know will appear once the page has loaded) as an argument, and the program will pause until that selector is visible on the page.
Once this element has been located and our promise resolved, it’s time to scrape our data.
Scraping our data
This part is going to vary depending on what CSS selectors are used to display the information that you want to scrape. It may require some CSS wizardry in order for you to get your desired results.
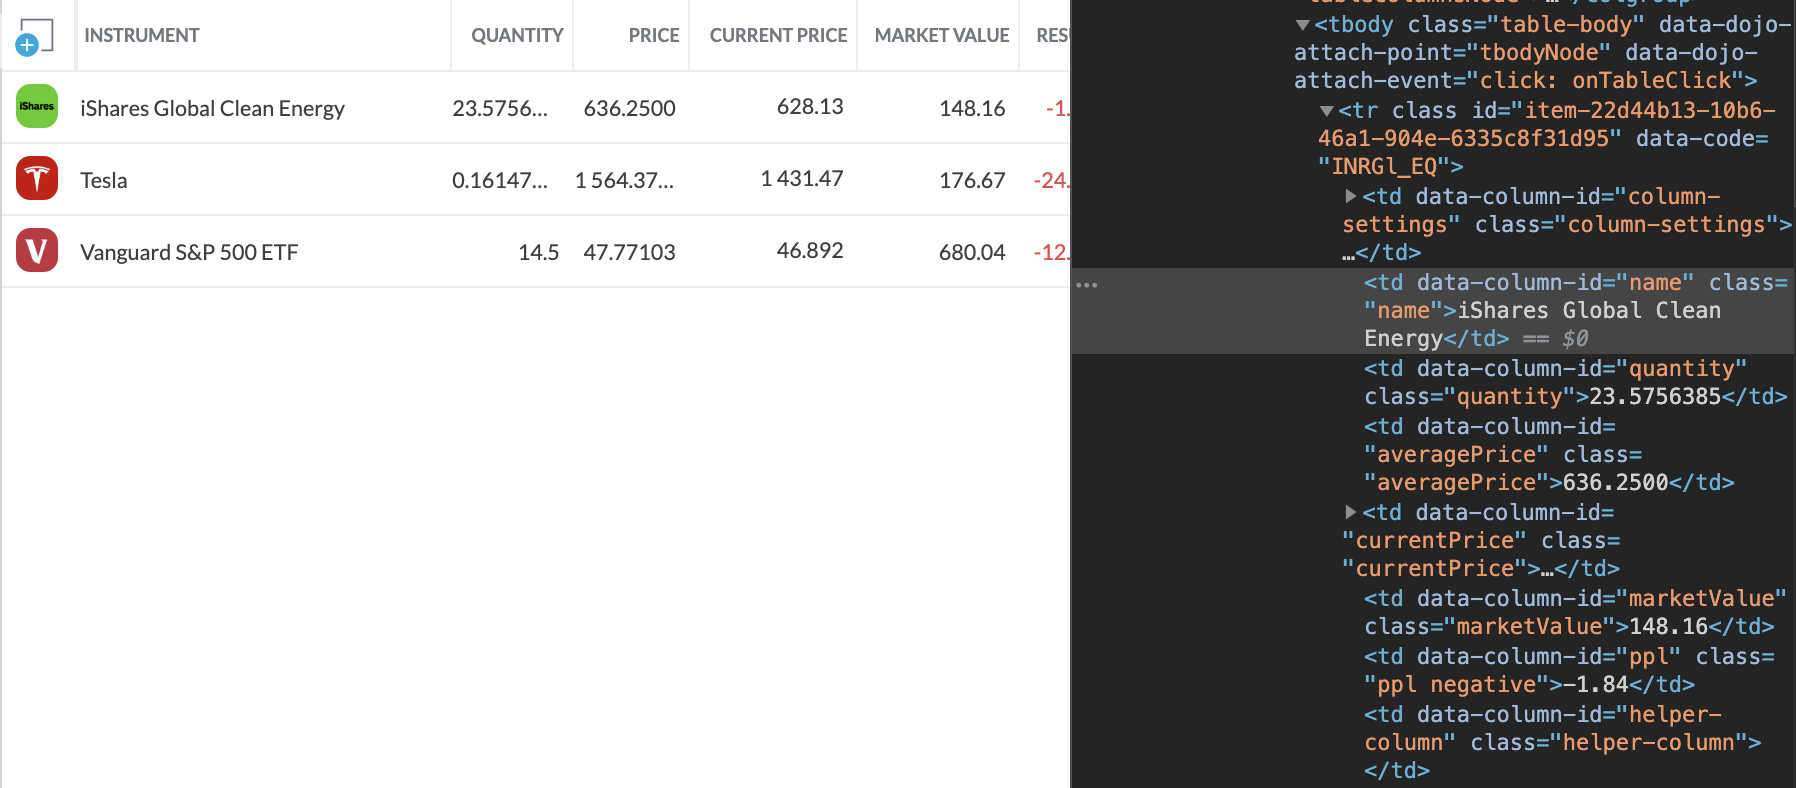
For my data, I want to extract the data held in the table rows. Unfortunately, the table rows in the source code of this page are not very distinguishable by using CSS, so I’ll be using the parent elements class in order to make the query more specific.
To do this, we can use the $$eval method on the page variable in order to extract multiple elements from the page. Alternatively if we only want to grab one, we can use $eval.
Using
$evaland$$evalis similar to usingquerySelectorandquerySelectorAll, respectively.
To use this method, we first pass in the CSS selector, followed by a callback to format the data how we want it. For my data, I want the name of the stock, the current market value, and my current performance of this stock.
The callback to this function will be called with an object as if you had used querySelector or querySelectorAll.
const investments = await page.$$eval('tbody.table-body tr', (elements) => {
  return Array.from(elements).map((row) => {
    return {
      name: row.querySelector('td.name').innerText,
      value: row.querySelector('td.marketValue').innerText,
      return: row.querySelector('td.ppl').innerText
    };
  });
});

console.log('> Results found!');
console.log(investments);
In the above snippet, we have;
- Queried all elements that match
tbody.table-body tr. - Created an array from the
nodelistthat is returned, in order to be able to use the ES6Maparray method to process each row in to a JavaScript object. - Used
querySelectoron each row that was found, in order to fetch the inner text results that we want to extract from the page.
Now when I run this using node index.js, I get my desired results outputted to the console!
[
  {
    name: 'iShares Global Clean Energy',
    value: '148.16',
    return: '-1.84'
  },
  {
    name: 'Tesla',
    value: '176.67',
    return: '-24.19'
  },
  {
    name: 'Vanguard S&P 500 ETF',
    value: '680.04',
    return: '-12.64'
  }
]
I am now free to do what I want with this data, from returning it in an API call to storing it in a database.
Conclusion
With this short and sweet introduction you should now be able to work your way around websites and scrape data at your leisure. Be careful when scraping data not to accidentally execute a DDOS attack, and be responsible when scraping data. There are plenty of other actions that you can carry out using puppeteer, such as click actions and more. For more information, head over to the official puppeteer docs!